Adenium plant cropping to grow caudex

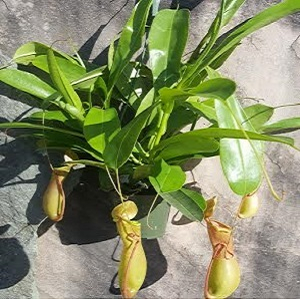
Q:  Pruning and cropping is the same thing right? When you have a adenium plant that’s a little leggy and the graft lines are high, how do you prune them to let the trunk catch up.  Thank you for your help

bonsai desert rose plant cropping
Cropping adenium plant to achieve larger caudex

Answer: Pruning or cropping adenium plant branches is need to grow fatter plants. Adenium plant leaf and branch growth mostly occurs are the end of the branches. Sometimes you may get a stray branch that pops out on an older branch below the current leaves but not often.  More branches/leaves means faster growth. Faster adenium plant growth requires more roots to grow which results in a larger caudex on the desert rose plant.

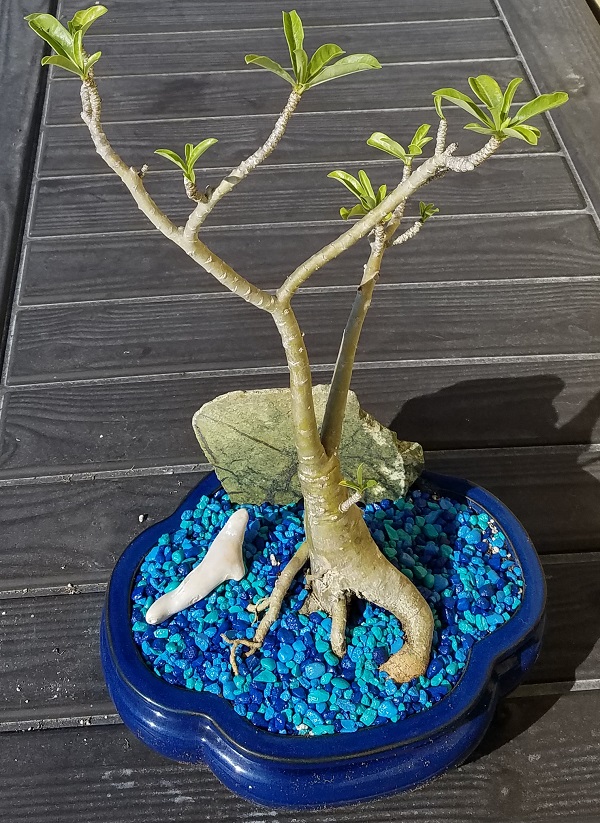
Here are the general rules we use to force the desert rose plant caudex to grow wider and to grow more branches:

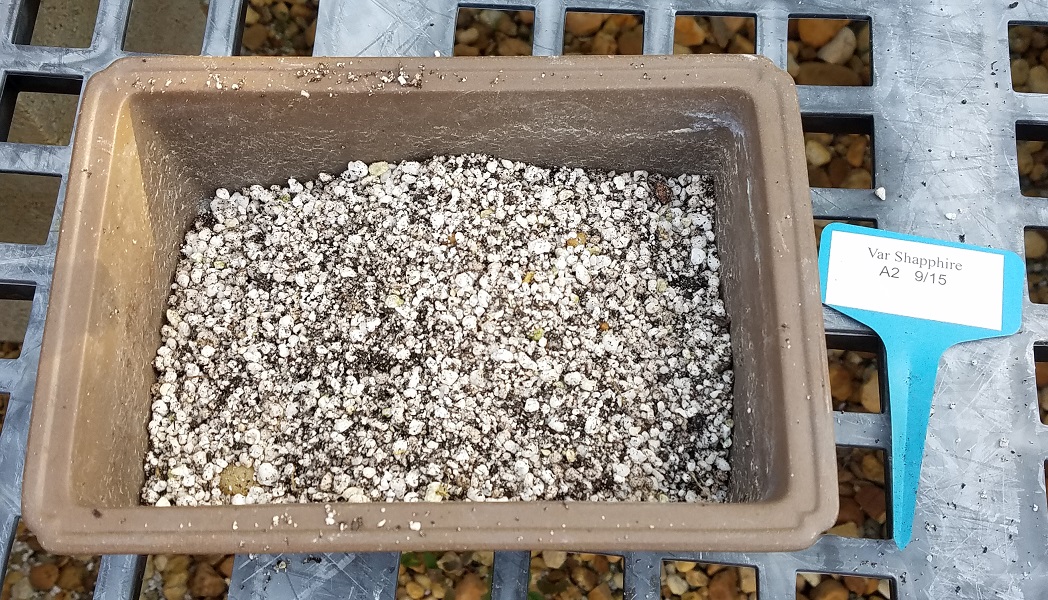
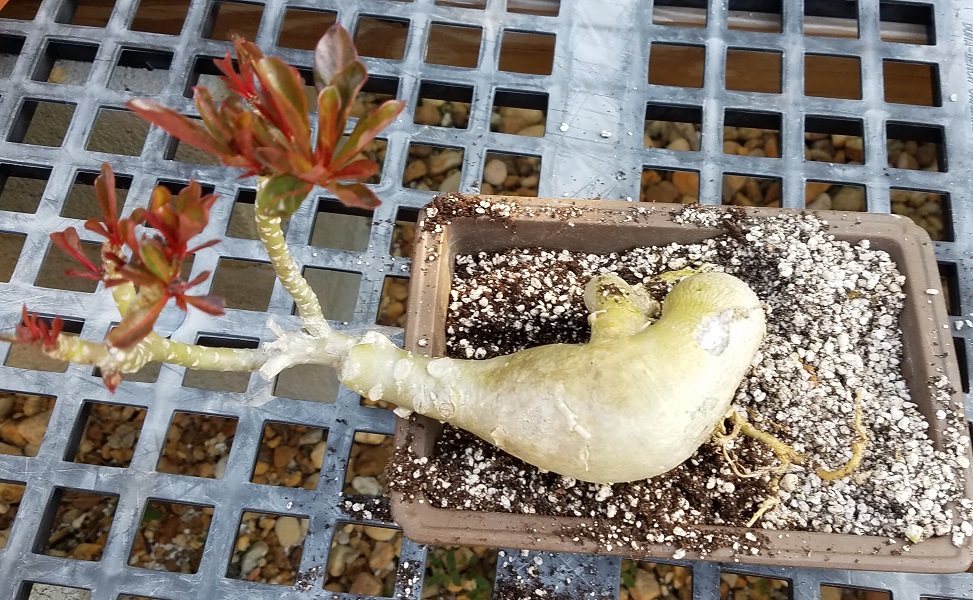
  1. Use a bonsai pot so the roots do not grow deep but wide
  2. After each growing season repot the plant (use same post if wide enough) but expose a bit more of the roots/caudex.  Do the repotting when you still have at least 30 days of your growing season let and after you see new branches below the cropping on your desert rose plant.
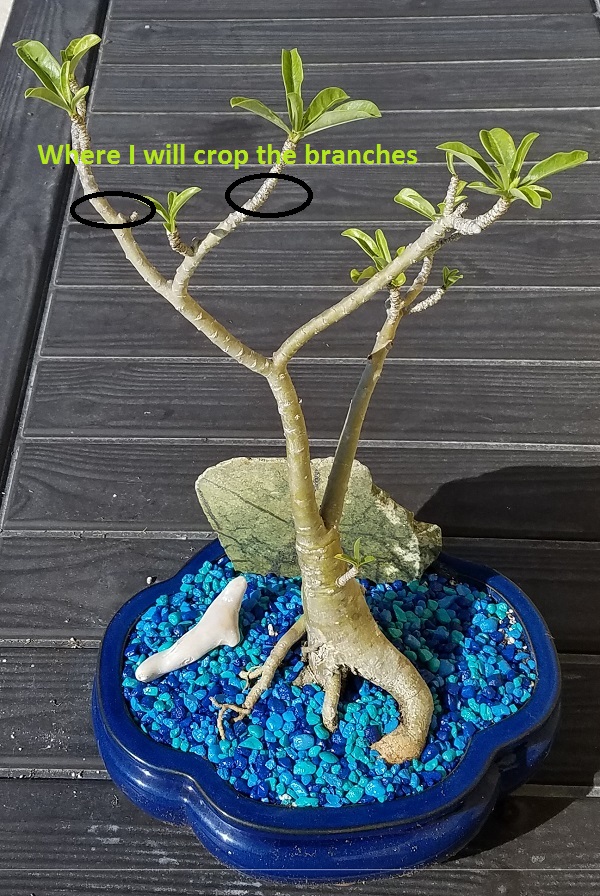
  3. Do not crop until the plant is in a new growing season and once you see new growth. Many types of plants you can crop while they are dormant, however, cropping an adenium plant produces the best results (not rot, no branch die back) during the spring  after you already notices some growth.
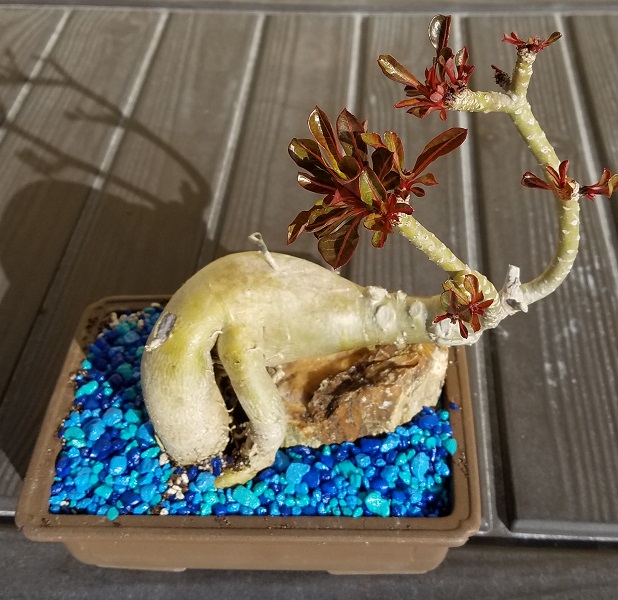
  4. Crop above the graft about 2″ to 3″.
  5. Once your crop / prune the adenium plant you must let it heal over for 5 to 10 days depending upon your growing environment.

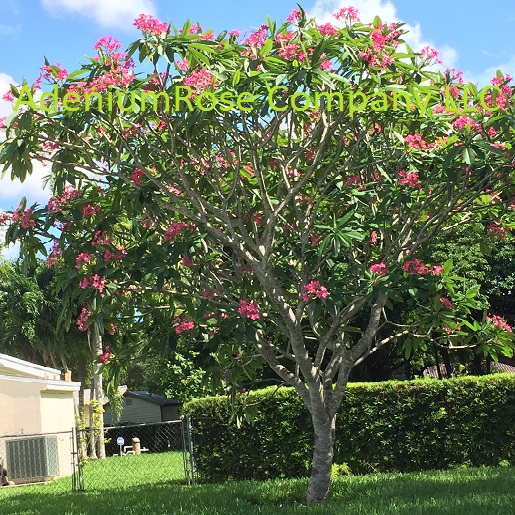
There are several other articles on this blog about cropping your adenium plant.  make sure you are using the correct soil, proving enough sunlight and use a root growth hormone such as Dyna-gro K-L-N each time you re-pot the plant.  These are the procedures Epic Grower LLC uses on the plants at their nursery.

Adenium bonsai plant – how to create a desert rose bonsai

Adenium bonsai starter plant project

Several clients requested a sequence of steps in creating a bonsai adenium plant from a standard size 4.5” pot size desert rose plant. The first step is to following the instruction received with the adenium plants and soak them in a rooting hormone like the one we use Dyna-Grow K-L-N. After soaking the desert rose plant for 30 minutes do not water it for 2 days. Now to creating a bonsai starter plant.

adenium bonsai plant
Adenium bonsai starter pot

The adenium plants from the AdeniumRose nursery can all be made into classic bonsai plants. First you need to select a bonsai pot based on the plants style. In our example, I’m using a standard 4” x 6” x 2” bonsai starter pot with plenty of drainage. You can select a round one, an square, oval or other type of bonsai pot – just make sure the pot is less than 3” deep and gives you around 1.5” all around the root system for 1 year of growth. Do not select an oversize pot which will actually slow the growth of the root system.

The soil we use is “soil-less” which basically means it contains no dirt which is offered on our website designed for cactus, succulents and other water thrifty plants. It’s a fast draining non-binding (does not form a top crust or clumps). The bottom holes of the bonsai pot are covered with screen material to prevent the loss of soil during watering.

desert rose bonsai creationg
final plant orientation for a bonsai adenium plant

Adenium Bonsai Orientation

Now I orient the adenium bonsai starter plant in the pot to see how I want it to be placed in the pot. Since the branches of the plant has a natural up curve I will use that as the focus of the design. The last 6 months I placed the plant on an un-leveled surface to force the branches to grow at an angle towards the sun to give it a curve. This is a common way to change the growth direction of branches when they are too young to wire.

Now put ½ your soil into the pot and then the plant. If the adenium bonsai plant does not stand properly on its own get something to support the plant as we are doing here with a wedged shaped rock.

desert rose bonsai rock
Wedge shape rock to support bonsai desert rose plant

Bonsai Adenium materials

All the rocks we use are non-porous so fungus will not grow on it. Now put in the remaining soil around the desert rose plant leaving some room for decoration rock on top.

The decorative rock on top is not just for looks. The rocks hold down the soil so the perlite does not float to the top. The perlite in the soil gives room for air flow in the soil. Air flow is important to prevent rot root with succulent plants.

small adenium bonsai plant
Final bonsai adenium plant with support rock

This adenium plant will grow in this port for approximately 1 year. I may wire the branches when they get thick. The plant used is a variegated sapphire adenium plant.  The main appeal to this desert rose plant is it unusual leaf type.  As this desert rose plant grows we will start to wire the branches them towards the left to give the appearance of wind blowing.

Growing adenium plants : Desert rose plant Soil & watering

Adenium Plants growing questions

We received a couple questions about growing adenium plants just received or recently received. The adenium plants from Epic grower LLC are growing in southeast Florida which is a tropical environment unlike any other areas of the USA.  It’s hot, extremely humid (90 to 100% everyday), very long hours of sunlight (10+)  plus we get many inches of rain every week during the summer. All of our plants are grown in the open in plastic nursery pots – no cover, no screen, nothing. The soil never dies up during the summer months.  The soil is critical here to prevent root rot and we have to fertilize every week since the nutrients in the adenium plants soil is leached out due to the rain. Yes, we do lose a percentage of plants to due root rot (about 2%) or other issues. We would lose many more if our soil was not correct.

Question from a client:

Just a quick question. I bought 4 jumbos last July and up to now they have no leaves but there are couple flower buds on two of them. I only water them little ( just enough to wet the caudex)  once every two days since I planted them in a pot. the weather in San Diego has been 75F during the day and around 60F at night. Most of my adenium has very little leaves. Is it because I gave them not enough water? I’m so afraid of root rot.

Answer:

If you are using the right soil you should not get root rot – use plenty of perlite (75% of mixture). Perlite gives the soil space to allow air flow which is critical to prevent rot root. The roots need water and nutrients. Water transport the nutrients to the roots so if you do not have enough nutrients or water the plant will grow slower. Use coir instead of dirt soil. Do not use moss in the mixture. In this blog there are many articles on soil. Use the search feature (top of blog) and put in the word “soil”.

Question from another client:

I received my order few weeks back. I checked my order and one plant that is 3 in 1 has all of its leaves are dry up. I was thinking when I plant it down new leaves will come out. Typically the leaves turned yellow and new ones come out. This plant came with leaves wilted. I planted in a pot with new soil for about 2 weeks now. As of today, no new leave comes out or any new development.

Answer:

Adeniums are desert plants. The majority of the time we cut off all leaves prior to shipping because the plants go into water conservation mode (leaves dry up and drop along with any buds). If you planted it per the instruction in the packing slip (right soil, root hormone, etc) the plant will recover faster. New leaf growth depends upon nutrients in the soil, amount of sun and hours of sunlight.  When we receive plants from Thailand (no leaves) it takes 4..6 weeks for the plants to recover (start to grow leaves). We are located in Southeast Florida so the plants get 9..10 hours of 100% unfiltered sun with temps at night between 78-83 degrees and day 88-95 degrees everyday during the summer (which here is late April through October). This is optimal for succulent type plants. If you lived in our area you know summer does not start on June 1st.

It is normal for the adenium plants to produce flowers first and then leaves.  Several of the just released jumbo size (releases this week) and standard size adenium plants bloom before we saw any new leaves. They were received in June and we started to see buds late in July (6 weeks later) and then leaves.

Hoya plants and adenium plants update

Several clients have requested a list of hoya plant varieties in process of propagating or will be ready soon to be released.  The rarest hoya plants are ones either hard to find, hard to propagate, very slow or difficult to grow. The hoya plants are offered based on rarity first and then size or age of the plant on the Epic Grower LLC website (www.epicgrower.com). Here is a list of ones we are propagating, ready or growing to propagate at our South Florida nursery:

hoya alagensis, hoya Anulata, hoya australis ssp australia, hoya australis ssp tenipes , hoya blashernaezii, hoya caudata, hoya caudata sumatra, Hoya carnosa tricolor, hoya cumingiana, hoya cv jennifier,  hoya cv routine, hoya cs optimistic, hoya darwinii, hoya dolichosparte pink, hoya elliptica, hoya erythrostemma “QSBG”, hoya flagellata, hoya forbesii, hoya glabra, hoya glabra schlechter 1908, hoya halconensis, hoya imperialis “white flower”, hoya imperialis red, hoya incrassata variegate, hoya lucardenasiana, hoya kenejiana red corona, hoya kenejiana variegata, hoya lacunosa, hoya lacunosa x obscura (cv sunrise), hoya lobbii “cream flowers”, hoya lobbii “dark red (black) flowers”, hoya macrophylla, hoya montana, hoya neo-ebudica, hoya pentaphlebia, hoya publicalyx red button, hoya publicalyx splash, hoya publicalyx silver, hoya Pink Archboldiana, hoya rigida, hoya rotundiflora (sp.square leaf), hoya sigillatis, hoya sp. chicken farm, hoya sp. miari jaya 58, hoya sp peral, hoya sp sarawak, hoya sp mari jaya 58, hoya sp phu wua, hoya sp pola.

We have representatives in Thailand/India/Japan/Africa sourcing rare hoya plants for us based on a list we give them and then our Thailand nursery specially grows the hoya plants from cuttings which we to transfer to our Miami location after they have a few small roots. Once we receive the hoya plant rooted cuttings (usually just 2..3 leaves) we grow the wax plants for several more months before we release them. Sometimes they only have one plant of a particular variety of a hoya plant to ship to us due to the plant either being very hard to propagate or hard to find. Yes, we have a few more varieties not listed at our Florida nursery we are working on growing plus we plan to get more hoya plants from Thailand in a couple of months to release next Spring.

desert rose plant flowering succulent
New Sunshine Rays Adenium plant

Adenium Plants

We expect to release a the last 2016 Adenium plants including a few new varieties.  Several of the new adenium plant varieties have flower recently (sunshine rays, jumbo size adenium white, rose white, and Stephanie).  Also, a few Happy gold and Mia thing bloomed.  I will update the website site with new adenium plant images this week.  Sorry no more standard or large size 3-in-1 adenium plants this year beyond the few left on the AdeniumRose Company web site.

Included in the release will be several Jumbo plants with white flowers, violet flowers and yellow. Yes I believe there are a couple adenium plant 2-in-1 plants (3-in-1 if you grow let it grow below the graft lines).  Please give me sometime to take images of the jumbo adenium plants.

Adenium, Hoyas and Plumeria plants mid summer check-up

It’s mid summer and there is still another 2 months of good growing season left in most parts of the USA.  Now is the time to give the plants a boost of nutrients including some time released fertilizer.  The summer rains and numerous watering of your adenium, plumeria and hoya plants have depleted the nutrients in the soil which needs to be replaced.  This is especially important to the adenium desert rose plants, plumeria plants and other non-house indoor plants.

It’s easy to overlook the micro-nutrients during the growing season because the adenium plants and plumerias look so green.  However,  the current condition of the plant is due to the previous 30-60 of nutrients in the soil.  The desert rose plants and plumerias have been sucking up the water and grabbing what they need to grow from the soil so now the soil has less nutrients.  In order to prevent the desert rose plants and plumeria plants from dropping leaves early you need to give them a boost. If you have not fertilized on a regular basis then start slowly at 1/2 strength for the first 3 weeks.  Also, make sure you include silica in the micro-nutrients (Pro Tekt) otherwise the plant will lose its ability to obtain the nutritionist you are supplying.

hoya plant in-door
Hoya pubicalyx splash

If you have hoya plants then it’s time to add some general liquid fertilizer such as Dyna-Gro grow to you weekly watering. Hoyas, use more water so the mineral are depleted faster.  Yes, you can use a time released fertilizer but most lack many of the micro-nutrients hoyas need to bloom.  Many of our publicalyx varieties of the hoya plants are blooming now at our nursery including red button and splash.

The publicalyx hoya plants are great fast growing and produces tons of flowers.  Hoyas are great indoor plants to grow in 60-70 percent light.   The carnivorous plants (pitcher plants, Venus fly traps, etc.) are great companion plants to the hoyas since they like similar environments.

How Nepenthes Pitcher Plants Get Nutrient – bug plant growing II

Nepenthes carnivorous pitcher plant eats insects including ants, wasps, flies and similar size bugs. It sounds a bit gross but it actually its an interesting process that is unique to carnivorous plants and a great way to get rid of pests (mosquitos). There are many variations of pitcher plants and variations of Nepenthes bug plants but all have the same basic way of obtaining nutrient. They can eat just about any insect that slips its way into the pitcher from flies to roaches.

The process begins by the pitcher bug eating plants giving off a vibrant pitcher color that attracts the insects from far and as they get closer the pitchers have a nectar that further helps attract the insect. As the insect reaches the peristome (larger thick ring at top of pitcher) it goes to eat the nectar and becomes stuck to the pitcher. Inside the pitcher there is a slippery nectar which the bug begins to slip down. The upper section is called the conductive/ retentive zone and the lower section of the Nepenthes carnivorous pitcher plant is known as the digestive zone.

When the bug reaches the digestive zone in the bug plant, it begins to be broken down and digested the insect in the pitcher. The carnivorous plant takes anywhere from a week to two months to fully digest a bug. It is not difficult to notice where the pitcher zone difference is because there will be browning in this area especially if the pitcher has too many bugs.

Once in the digestive zone the Nepenthes pitcher walls give off enzymes which break down the insect to digest it. The bugs never digest one hundred percent to where there are no remains. You may always see bug parts in your Nepenthes pitcher plant until the life of the pitcher is over.

At this point the nutrients enters through the tendril which is the thin vine that connects to the pitcher plants leave. This is how carnivorous plant, Nepenthes pitcher plants, get all their nutrient from which is why it does not need plant food or fertilizer which most the time will end up harming and killing you carnivorous plant.

Carnivorous plants Nepenthes Growing Tips – bug plant

Bug eating plant carnivorous
Pitcher plant Nepenthes Alata

Growing a Nepenthes bug eating plant is not a difficult task but basic knowledge and tips are always helpful in order to have a healthy plant with beautiful looking pitchers. Some examples of lowland Nepenthes ate N. Alata (Yes, Adenuimrose Company has  them now in stock), N. Eymae, N.khasiana, N. mirabilis, N. ventricosa and many others. Here are basic helpful growing tips to achieve the healthiest lowland Nepenthes bug plant possible:

  1. Light: Nepenthes, a pitcher plant, needs a few hours of bright 50%  sunlight. If the plant is kept indoors use a light with a wide spectrum and far enough away from the plant to avoid burning or overheating the plant.
  2. Temperature: There are lowland and highland Nepenthes bug plants. Focusing on lowland Nepenthes carnivorous plant – they like warm and humid weather. They enjoy days around 75-85 degrees Fahrenheit and nights between 65-75 degrees Fahrenheit. If you live in an area that has cold winters, during this time bring your carnivorous Nepenthes pitcher plant indoors.
  3. Planting Medium: Nepenthes enjoy a sphagnum moss, peat moss, and/or perlite mix. Make sure these don’t have any type of fertilizer or plant food. These plants enjoy there planting medium to be constantly moist – not dry. Bug eating plant Nepenthes should potted be in an easy draining pot so the plant does not drown. Make sure to rinse off all potting medium with distilled water to remove any chemicals since you Nepenthes does not like chemicals, fertilizer or plant food.
  4. Food/Water: The pitcher plant Nepenthes eat insects. The “pitcher” should have water inside of them at all times. If outside, the carnivorous plant should not need any feeding because it will eat all insects that enter into its pitchers. Remember not to fertilize or add plant food to your carnivorous plant Nepenthes. All nutrients it needs will come from the insects. Fertilizers, plant food and other planting chemicals will harm your Nepenthes bug plant. If you keep your bug plant Nepenthes pticher plant indoors remember to occasionally add a few insects into its mature pitchers occasionally using tweezers.

Pitcher plants are great for beginners and seasoned bug eating plant collectors.  These are great beginner learning tips that should keep your Nepenthes alata bug eating plant looking glorious and healthy for many years. If you have any questions feel free to post below. Treat your carnivorous plant Nepenthes with love and it will give you beauty!

New Plumeria plants added to AdeniumRose Company site

AdeniumRose Company just released several of well rooted varieties of plumeria plants growing in 6″ pot sizes.  The plumeria plants have thick stems/trunks and thick leathery leaves. The plumeria flowers are produced at the end of the branches in showy clusters. Plumeria plants are collected for the beauty and wonderful fragrance. Used in Hawaii as a welcome gift to visitors as a Lei – floral necklace of flowers.

plumiera plant drock orange
Drock Orange plumeria plant flower variation 1

The plumeria plants flowers are very fragrant and they can be easily grow in pots. Use the same type of soil you use for your succulents or use a tropical mix but give them more water than succulents during growing season.  In addition, use the fertilizers you use for your adeniums.  Plumeria plants are tropical but they tend to do great when you treat them like a succulents except for watering. They can handle more water, more frequently, but they still need the same loose soil type when in pots to protect from trunk rot.   The roots very rarely have rot problems since its the trunk and branches that retain the water not the roots or leaves as succulents do.


tropical plant plumeria drock orange
Drock Orange plumeria plant flower variation 2

All well rooted plumeria plants offered by AdeniumRose Company are growing in 6″ pots at the AdeniumRose nursery located in southeast Florida. All plants are propagated by cuttings received from a Hawaiian grower. Height varies from 16″ to 21″ tall. All plumiera plants have two or more branches not small nibs.  The flower colors will vary based on nutrients, amount of sun the plant receives, watering, age of the plumeria plant and image conditions.

The two images of Drock Orange images in this article are from the same plant. The first one was taken about 30 days after planting and the 2 variation a few days ago. They both have the same coloration but the second variation of the plumeria plant flower is more intense. As the plant ages and when fertilized one a regular bases the flowers will  usually get better tones.


Bonsai adenium plants and cropping branches

Wow! It’s hot and humid out there working with the adenium, Hoyas, Plumerias and other plants.  AdeniumRose Company just finished the 2nd line of a drip water system for the hoyas (300 more plants). Drip irrigation conserves water and provides the hoya plants with more consistent watering to keep them moist during growing season and control liquid fertilizing.

Anyway, I potted another adenium plant that had problems last Fall in a bonsai pot with added accent pieces to make it more like a true bonsai scene.

desert rose plant bonsai
Upright bonsai adenium plant

Next month I will start training this one (cropping and wiring)  to develop a canopy and maybe add a small fishing man (mudman).  The adenium plants caudex is approximately  4″ wide and 3 inches wide. The pot is a 8″ x 6″ x 2.5″ made of ceramic with three holes in the bottom for drainage. The small white thing that looks like a “white seal lion” is actual an agate (semi-precious rock).  The green back ground rock is an jasper (I’m a rock/gem collector/cutter since I was 7 yrs old).

AdeniumRose Company may start listing some rocks such as petrified wood, agates, crystals, etc. (not ordinary rocks) to use in settings. If you use rocks, its best to use ones that are not porous.

The branches of this adenium were cropped last fall when we discovered roots problems. The adenium plant has fully recovered and three branches will be cropped next month – can you see which one? To create a canopy bonsai style adenium plant it needs a bunch of short branches in an umbrella share.

adenium bonsai traning
Where to crop the desert rose plant

The adenium plants branches on the left need cropping. The image shows where I plan to do the cropping of the adenium plant.  The branch in the back (small branch) has three little branches which I hope will grow another 3 inches so it can be cropped to by the end of the summer.

If you have any questions concerning cropping, wiring or even drip water systems please post them here for a quick reply.  Have a great week!

Plumeria plants Dwarf, not so dwarf and stardard sizes

Mature plumeria plant none dwarf
Mature plumeria plant not a dwarf

Plumeria plants, when grown in the ground, vary in size and length of each segment.  The plumeria plant segments on the dwarf plants are much shorter than on standard plumerias. The questions many people ask “is there a difference in the frequency of flowering or flower size”.  Look at the two images of plumeria plant (trees).

The one with the pink plumeria flowers is a mature tree about 24 feet tall. The segments/branches are longer than the dwarf.

plumeria plant
Dwarf yellow plumeria plant full grown

The dwarf plumeria plant image shows a full grown tree and has developed a canopy.  The dwarf plumerias’ height is approximately 12 feet high and even wider.  Notice the segments/branches are shorter but the flower size is very similar to a standard plumeria plant.

If you grow your plumeria plants in pots then it does not matter whether they normally grow to 25′ in the ground or not.   Instead choose a plumeria flower color or fragrance you like. When growing a plumeria in a pot the segments of a dwarf will be shorter but only by about 20%. The pot will restrict the plants’ growth and the plumeria plant will adapt. We have both types growing in pots with many flowers every year. The standard plumerias grow a bit faster (taller) in the pots but both types flower without any problems.

When growing plumeria plants in a pot it’s important to remember to weigh down the pot because the plant will become top heavy since it grows a canopy.  Use a pot that has holes in the bottom and AdeniumRose Company recommends that it is twice as deep as it’s wide.  Plumerias do not like the cold so you will need to bring them in during the winter when the temperatures get below 55 degrees.  During the growing season keep the soil damp but not wet. We use the same soil for our plumerias as we do for adeniums to prevent rot.  The plumeria plant is a tropical plant that will handle tons of sun and rain.